Microsoft Word 2010 is a good program for writing all our papers. It is a powerful program, but I will be covering only the basics. With the basics, you should be able to complete a paper.
MS Word helps you to create, edit and revise documents. When you click and open the program a document will appear and you can start typing.
Make Margins Wider or Narrower
The margins are set at a default of 1 inch on the top, bottom, and sides, which normally works for most documents. There might be a time when an instructor wants different margins on his/her papers.
To change the margins, find the Page Layout tab in the Page Setup and click Margins.

You will see a choice of margins that are the most common. Click on any of these to apply them to your document.
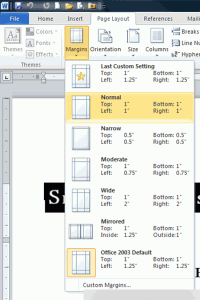
If the margins that you want are not in the choices, there is a Custom Margins selection at the bottom. Click this and and you can customize the margins.
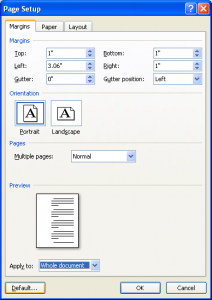
You can also change the orientation of the page and see a preview of what the page will look like if the page is flipped. You can also apply the margins to a specific page by using the down arrow at the bottom of this popup window.
The Default button at the bottom will allow you to make your custom margins the default margins so of any new document. When you are done, just click “OK” and the changes will take effect.
Change Your Fonts
The Font Box is on the Home screen. Click the down arrow to quickly select the style of your font, size, color, bold italics and more. This is a handy feature, because most instructors want a specific font and size on papers submitted to them. I had one instructor who said that Times Roman was easier on his eyes.
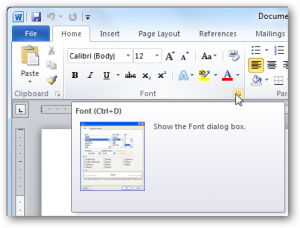 If you want a more detailed look at the font before you select it or want specialized selections such as a strikethrough, all caps or all lowercase and other selections, click the Dialog Launcher box in the corner as shown on the example above and the following screen will appear, where you can view and make your selections. The detailed fonts are handy when you are creating a document and are able to customize it because you can change the font to one that for instance, might better suit your own individuality.
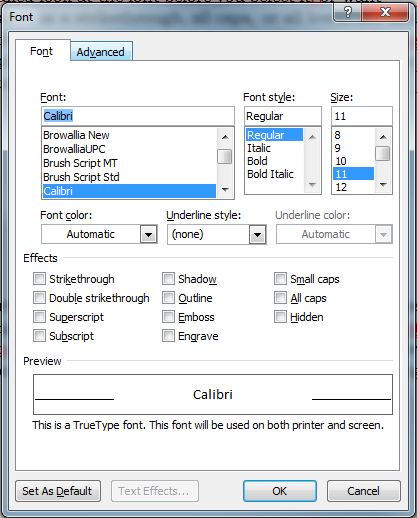
If you have already started typing and realize that you have not changed the font, you can always highlight the portion you want to change. If you want to change the entire document to a different font, use the Edit box on the right side.
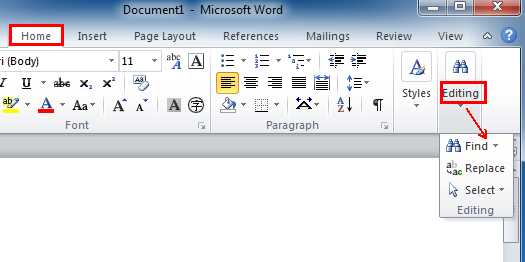
Click the Select button and you will see the select all button. Click this button and then pick your font, size etc. and the entire document will change.
Adjust Your Line Spacing
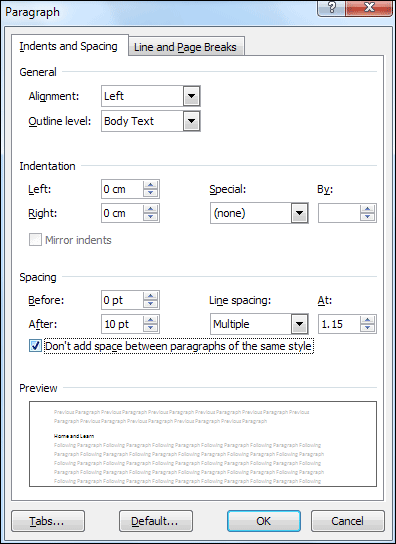
On the home tab, click the arrow in the lower right corner of the Paragraph section to see formatting options. In this box you can change the line spacing. The line spacing is set to single by default and most papers require double spacing. You could also have an instructor who might want an uncommon spacing on assignments and knowing how to change the spacing will come in handy.
If you have already typed your document, highlight the portion you want to change the spacing in and then proceed to the Paragraph box to change the spacing. I personally change the Before and After spacing to “0” to prevent larger spacing than I want. If this is not changed, it can really mess up a paper by interfering with any changes in spacing you might make as you are doing the paper.
Save Your Document
Click the File tab and click “Save As” in the name box, type in the name of your document and the file you want to save it in and click “Save.”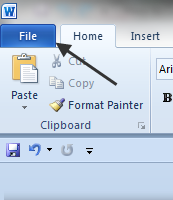
There might come a time when you are asked to save the file as a 2003 version or earlier or as a different type of document. If this happens, click the “Save As Type” down arrow and a box will appear that will let you save the document as a different type of file.
Und0, Redo, and Repeat
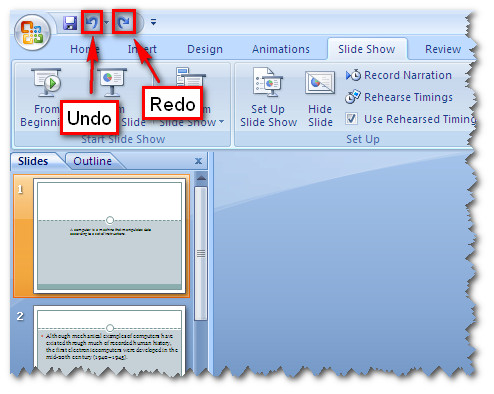
There are two buttons at the top of the page that you can use if you did something you didn’t want to and also to repeat what you last did. Of all the features, I think this one is the most handy. I don’t know how many times I went to make a change and my whole document was messed up. These buttons can take that sinking feeling in your stomach away.
To undo what you didn’t want to do or don’t like, click the undo button and if you want to repeat what you just did, click the redo button (see below).
 Check Your Spelling and Find New Words
To check the spelling in a document, click the Review button and then click the Spelling & Grammar button. You can also use the Thesaurus button to look up words in the thesaurus.

Print a Document
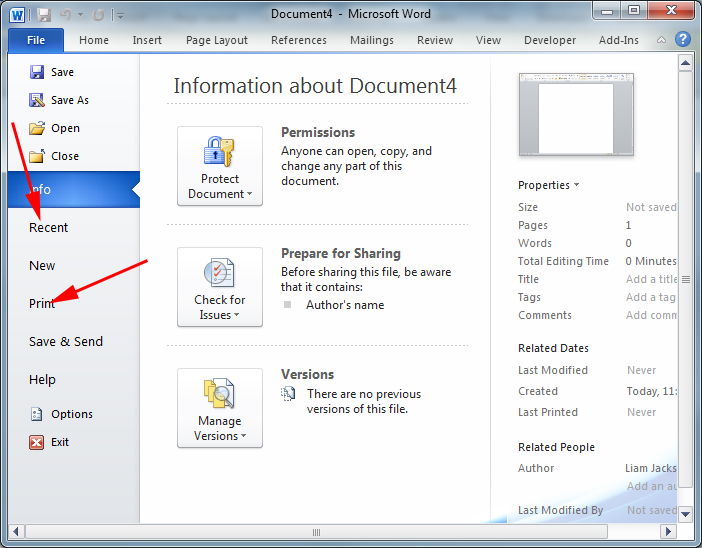
To print the document, click the File tab on the left at the top of the box and a Print dialogue box will come up.
Click Print to see your printing options and a preview of the document. It is very helpful to see the preview of the document so that you can be sure it will print the way you want. This print preview also saves a lot of ink and paper.
Opening an Existing Document
On the File menu, the same one used to print, there is an Open button. Click this to see your recent documents or show you your computer’s “library,” depending on how you have Microsoft Word set up. If you have the list of recent documents, you can click the document you want. If your library comes up or your document is not there, you can click on the file that holds your document and once you see your document, click on it and it will open.
This concludes this month’s blog. Next month, I will cover another software program used frequently for course work. If you have any suggestions, comments or would like a specific feature of a program covered, please post a comment below to let me know!


